
Dental Implant Post-Op Instructions: A Comprehensive Guide
Following your dental implant procedure, a phased recovery spanning 3-6 months is typical․ Initial healing focuses on gum tissue, while osseointegration—bone fusion—takes 3-5 months․
Expect a gradual return to normal function, guided by follow-up appointments and diligent oral care․ Bone grafting, if needed, extends the timeline․
Initial 24-48 Hours: Immediate Post-Surgery Care
The first 24-48 hours are crucial for initial healing after dental implant surgery․ Expect some grogginess from anesthesia; rest is paramount․ Apply firm, consistent pressure to the surgical site with gauze to control bleeding – change it every 30-45 minutes, or as directed․
Avoid rinsing vigorously, spitting, or using straws, as these can dislodge the blood clot essential for healing․ Stick to a liquid diet, avoiding hot or carbonated beverages․ Mild discomfort is normal; take prescribed pain medication as directed, but avoid overdoing it․
Ice packs applied to the cheek (20 minutes on, 20 minutes off) will minimize swelling․ Limit physical activity and avoid touching the surgical site․ Report any excessive bleeding, severe pain, or unusual symptoms to your dentist immediately․ Gentle care during this period sets the stage for successful osseointegration․
Managing Pain and Discomfort
Post-implant discomfort is typical, but manageable․ Your dentist will likely prescribe pain medication; take it as directed, even if pain seems minimal initially, to stay ahead of it․ Over-the-counter pain relievers, like ibuprofen or acetaminophen, can supplement prescription medication, but consult your dentist first․
Apply ice packs to the cheek in 20-minute intervals during the first 24-48 hours to reduce swelling and numb the area․ Avoid strenuous activity, as it can increase blood flow and exacerbate pain․
As pain subsides, transition to softer pain relief methods․ Warm salt water rinses (after the first 24 hours) can soothe the gums․ Report any severe, persistent, or worsening pain to your dentist promptly, as it could indicate a complication․ Remember, effective pain management is key to a comfortable recovery․
Controlling Bleeding and Swelling
Some bleeding after dental implant surgery is normal․ Apply firm, consistent pressure to the surgical site with sterile gauze for 30-60 minutes at a time until bleeding subsides․ Avoid rinsing vigorously or spitting, as this can dislodge the blood clot and restart bleeding․
Swelling is also a common post-operative effect․ Continue using ice packs on your cheek for the first 48 hours, applying them for 20 minutes on, 20 minutes off․ Elevate your head with extra pillows, even while sleeping, to minimize swelling․
After 48 hours, switch to warm compresses to encourage blood flow and reduce bruising․ If bleeding or swelling is excessive or doesn’t improve, contact your dentist immediately․ Following these steps will help ensure a smoother, more comfortable healing process․
Dietary Guidelines: First Few Days
Following dental implant surgery, a soft food diet is crucial for initial healing․ For the first 24-48 hours, stick to liquids like broth, smoothies (avoiding seeds), and yogurt․ Gradually introduce pureed foods, applesauce, mashed potatoes, and scrambled eggs․
Avoid chewing directly on the surgical site․ Cut food into small pieces and consume it on the opposite side of your mouth․ Steer clear of hard, crunchy, sticky, or spicy foods, as these can irritate the area or damage the implant site․
Hydration is also vital; drink plenty of water․ As healing progresses, you can slowly expand your diet, but always prioritize soft, easily manageable foods․ Proper nutrition supports tissue repair and minimizes discomfort․
Oral Hygiene: Gentle Cleaning Practices
Maintaining excellent oral hygiene is paramount after dental implant surgery, but requires a gentle approach․ For the first few days, avoid brushing directly over the implant site; Instead, gently rinse your mouth with a warm salt water solution (1/2 teaspoon salt in 8 ounces of water) after meals and before bed․
This helps keep the area clean and promotes healing․ After 24-48 hours, you can begin gently brushing your teeth, carefully avoiding the surgical site․ A soft-bristled toothbrush is essential;
Avoid vigorous rinsing or spitting, as this can disrupt blood clot formation․ As healing progresses, your dentist will provide specific instructions on when and how to resume normal brushing and flossing around the implant․
Weeks 1-2: Early Healing Phase
During weeks one and two, focus on rest, bleeding control, and gentle rinses․ Swelling will gradually subside, and initial healing begins, requiring a soft diet․
Pain Management Transition
As you progress into weeks 1-2 post-implant surgery, a noticeable shift in your pain management strategy will occur․ The initial reliance on stronger prescription pain medication should begin to decrease, transitioning towards over-the-counter options like ibuprofen or acetaminophen․
It’s crucial to follow your dentist’s specific recommendations regarding dosage and frequency․ Don’t hesitate to contact them if your pain isn’t adequately controlled with these alternatives․ Remember, some discomfort is normal during the healing process, but it shouldn’t be debilitating․
Applying ice packs to the surgical site for 20-minute intervals can also provide significant relief․ Focus on managing discomfort proactively, allowing you to adhere to your soft food diet and oral hygiene routine․ A gradual reduction in pain signals positive healing and osseointegration progress․
Avoid activities that exacerbate pain, and prioritize rest to facilitate optimal recovery․ Consistent communication with your dental team is key to a smooth pain management transition․
Soft Food Diet Expansion
During weeks 1-2 following your dental implant placement, you can cautiously begin expanding your soft food diet․ While initially limited to liquids and purees, you can now introduce slightly more textured options, ensuring they require minimal chewing․
Good choices include well-cooked pasta, scrambled eggs, soft fish, mashed potatoes, and yogurt․ Gradually incorporate foods like tender chicken or ground meat, always cutting them into small, manageable pieces․ Avoid anything crunchy, chewy, or spicy, as these can irritate the surgical site․
Continue to prioritize nutrient-rich foods to support healing․ Listen to your body; if a food causes discomfort, revert to softer options․ Maintaining adequate hydration is also vital․ This phased approach allows your gums to heal without undue stress, promoting successful osseointegration․
Remember, patience is key․ A gradual dietary progression is crucial for a comfortable and complication-free recovery․
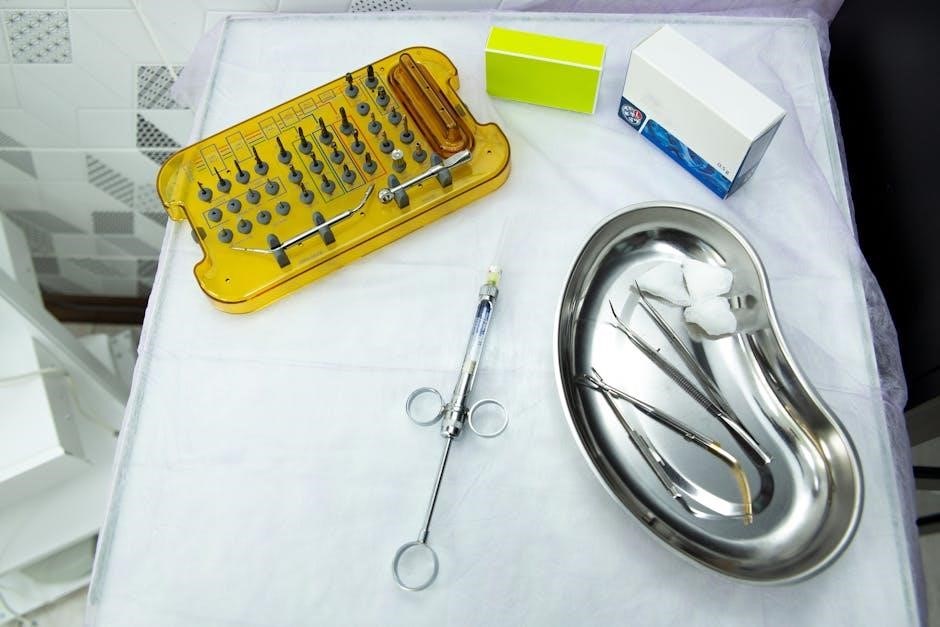
Sutures and Stitches: Care and Follow-Up
Following dental implant surgery, sutures or stitches are commonly used to close the gum tissue․ Proper care is essential to prevent infection and promote healing․ Gently rinse your mouth with a prescribed antiseptic solution after meals, avoiding vigorous swishing that could disrupt the sutures․
Avoid touching or probing the stitches with your tongue or fingers․ While some sutures are dissolvable and will disappear on their own within 1-2 weeks, others may require removal by your dentist․ Your post-operative instructions will specify which type you have․
Attend all scheduled follow-up appointments so your dentist can monitor the healing process and remove non-dissolvable sutures when appropriate․ Report any signs of infection, such as increased pain, redness, swelling, or pus, immediately․
Maintaining good oral hygiene around the surgical site, as instructed, is crucial for optimal healing and a successful implant outcome․
Activity Restrictions: Avoiding Strenuous Exercise
Following dental implant surgery, it’s crucial to limit physical activity for the first few days to promote proper healing and minimize complications․ Avoid strenuous exercise, heavy lifting, and activities that increase blood pressure to the head and neck․
Increased blood flow can disrupt the healing process and potentially cause bleeding from the surgical site․ Rest is paramount during the initial recovery phase, typically the first 48-72 hours․ Gradually reintroduce light activity as tolerated, listening to your body’s signals․
Avoid activities that involve bending over, straining, or forceful movements․ Consult your dentist regarding a safe return to your regular exercise routine, typically after the first week, depending on your individual healing progress․ Prioritize rest and allow your body to focus on recovery․
Following these guidelines will contribute to a smoother and more successful implant integration․
Weeks 3-4: Continued Healing and Integration
During weeks three and four, expect continued gum healing and bone integration․ Gentle oral hygiene and a gradually expanding diet support this phase of recovery․
Gradual Return to Normal Diet
As weeks 3-4 progress, you can cautiously expand your dietary choices․ Begin by introducing softer foods that require minimal chewing, like pasta, yogurt, and well-cooked vegetables․ Avoid hard, crunchy, or chewy items that could potentially disrupt the healing process or place undue stress on the implant site․
Slowly incorporate slightly more textured foods as your comfort level increases․ Pay close attention to how your mouth responds to each new addition․ If you experience any discomfort or swelling, revert to a softer diet for a few days․
Hydration remains crucial; continue drinking plenty of water․ Avoid extreme temperatures – opt for lukewarm foods and beverages․ Remember, a gradual approach is key to successful integration and minimizing any post-operative complications․ Listen to your body and prioritize gentle progression․
Ultimately, the goal is to return to a normal, balanced diet, but patience and mindful eating are essential during this phase․
Increased Oral Hygiene – Brushing and Flossing
During weeks 3-4, as initial healing progresses, you can gently increase your oral hygiene efforts․ Continue brushing twice daily with a soft-bristled toothbrush, focusing on all surfaces of your teeth, including around the implant․ Use a non-abrasive toothpaste to avoid irritating the surgical site․
Introduce flossing cautiously, avoiding direct snapping or forceful insertion near the implant․ Water flossers can be particularly helpful during this phase, providing a gentle yet effective cleaning method․ Pay attention to any bleeding or discomfort; if present, reduce intensity․
Antimicrobial mouth rinses, as prescribed by your dentist, can further aid in maintaining a clean environment․ Consistent, gentle oral hygiene is vital for preventing infection and promoting long-term implant success․ Remember, meticulous care is paramount․
Regularly inspect the area for any signs of inflammation or unusual discharge, and report any concerns to your dental professional․
Monitoring for Infection: Signs and Symptoms
Vigilant monitoring for infection is crucial throughout the recovery period․ Be alert for signs such as persistent, localized pain that intensifies rather than diminishes, or pain not relieved by prescribed medication․ Increased redness or swelling around the implant site, especially if spreading, warrants immediate attention․
Look for any pus or discharge emanating from the surgical area, and note any unusual odors․ A fever of 100․4°F (38°C) or higher is a significant indicator of potential infection․ Difficulty breathing or swallowing should be reported to emergency services immediately․
Changes in gum color, such as a deepening red or purple hue, can also signal a problem․ If you experience any of these symptoms, contact your dentist promptly․ Early detection and treatment are key to preventing complications and ensuring successful implant integration․
Do not hesitate to reach out with any concerns, no matter how minor they may seem․

Months 1-3: Osseointegration Phase
During these months, the implant fuses with your jawbone—osseointegration․ Regular check-ups monitor progress, ensuring stability․ Avoid excessive force on the site, and maintain excellent oral hygiene․
Importance of Osseointegration
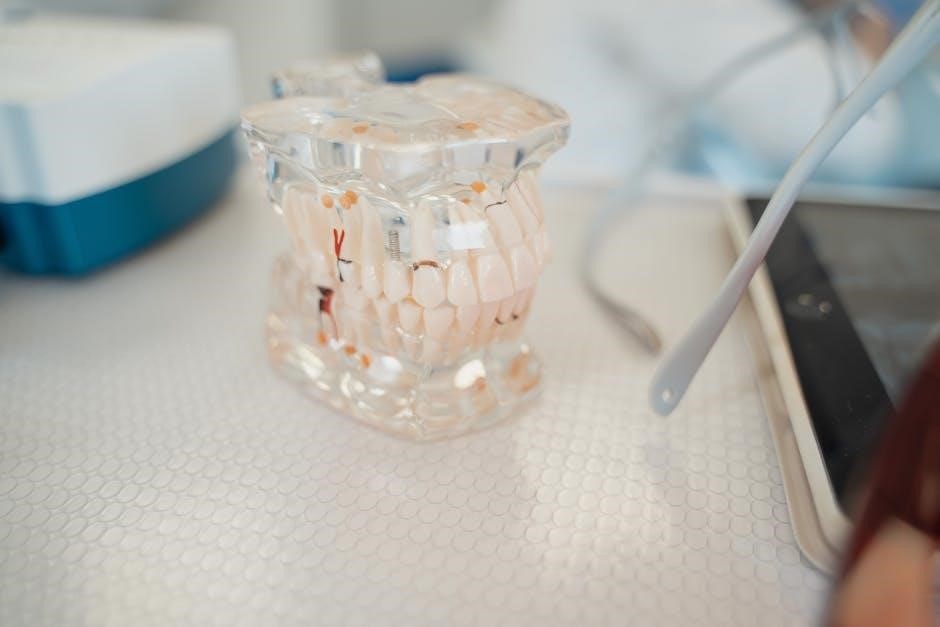
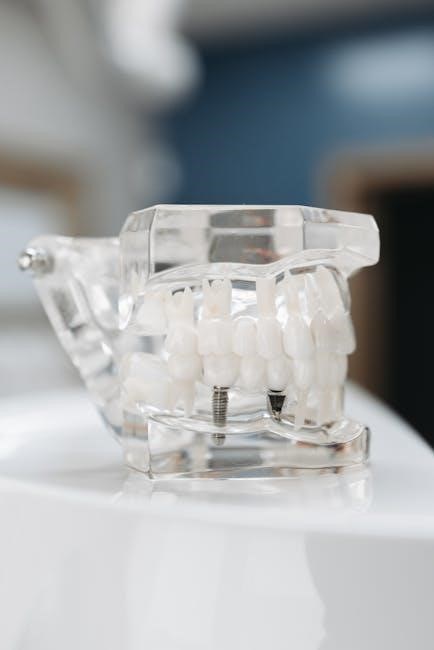
Osseointegration is the cornerstone of long-term dental implant success․ This biological process involves the direct structural and functional connection between living bone and the surface of a load-carrying and osseointegrated implant․ Essentially, it’s how the implant becomes a stable part of your jaw․ Without successful osseointegration, the implant won’t be able to withstand the forces of chewing and biting, leading to potential failure․
The process typically takes between three to five months, though individual healing rates vary․ During this time, it’s crucial to adhere strictly to post-operative instructions․ Avoiding excessive pressure on the implant site, maintaining meticulous oral hygiene, and attending all scheduled follow-up appointments are paramount․
Factors like overall health, bone quality, and adherence to post-operative care significantly influence the speed and success of osseointegration․ A stable, osseointegrated implant provides a solid foundation for the final restoration – the crown – ensuring a functional and aesthetically pleasing result that can last a lifetime․
Follow-Up Appointments: Monitoring Progress
Regular follow-up appointments are vital throughout your dental implant journey, ensuring optimal healing and long-term success․ Initially, these visits, scheduled frequently in the weeks following surgery, allow your dentist to assess gum tissue health, monitor for signs of infection, and evaluate the initial stages of osseointegration․
As healing progresses, appointments become less frequent but remain crucial․ X-rays are typically taken to visualize bone growth around the implant, confirming successful fusion․ Your dentist will also assess your bite and ensure proper function․
These check-ups aren’t just about technical evaluation; they’re an opportunity to address any concerns you may have and receive personalized guidance on oral hygiene and care․ Consistent monitoring allows for early detection and management of potential complications, maximizing the longevity of your implant investment․ Don’t hesitate to communicate any discomfort or changes you experience between appointments․
Potential Complications and When to Contact Your Dentist
While dental implant surgery boasts a high success rate, potential complications can occur․ Infection at the implant site is a concern, manifesting as increased pain, swelling, redness, or pus․ Nerve damage, though rare, can cause numbness or tingling․ Implant failure, where the implant doesn’t fuse with the bone, is also possible, requiring further evaluation․
Contact your dentist immediately if you experience: excessive bleeding that doesn’t subside with pressure, severe or worsening pain unresponsive to medication, high fever, difficulty breathing or swallowing, or any visible signs of infection․
Prompt attention to these symptoms is crucial to prevent further issues․ Don’t hesitate to reach out with any unusual sensations or concerns, even if they seem minor․ Early intervention significantly improves the chances of successful resolution and protects your investment in a healthy, functional smile․
Months 3-6: Final Restoration Preparation
As osseointegration nears completion, preparation for your final crown begins․ This phase may involve abutment placement, a connector for the crown, ensuring a precise fit and function․
Bone Grafting Considerations & Extended Timeline
If bone grafting was necessary during your dental implant procedure, anticipate a longer recovery and healing period․ This is because bone grafts require additional time to integrate with your existing jawbone, providing a stable foundation for the implant․ The typical implant recovery timeline extends by an additional 3 to 6 months when bone grafting is involved․
During this extended phase, diligent adherence to post-operative instructions is crucial․ This includes maintaining meticulous oral hygiene, attending all scheduled follow-up appointments, and carefully following dietary recommendations․ Your dentist will monitor the graft site closely, often using imaging techniques to assess the progress of bone integration․
It’s important to understand that bone grafting success rates are generally high, but individual healing times can vary․ Factors such as overall health, smoking status, and the extent of bone loss can influence the timeline․ Patience and consistent care are key to ensuring a successful outcome and a strong, lasting implant foundation․
Abutment Placement: Preparing for the Crown
Once osseointegration is complete, the next step involves abutment placement․ An abutment is a connector piece that attaches the final restoration (crown, bridge, or denture) to the dental implant․ This is often a relatively minor surgical procedure, frequently performed under local anesthesia․ You may experience some mild discomfort or swelling following abutment placement, which can typically be managed with over-the-counter pain medication․
Following abutment placement, your gums will need time to heal around the new component, usually a couple of weeks․ During this period, maintaining excellent oral hygiene is paramount to prevent infection and promote healthy tissue growth․ Your dentist will take impressions of your mouth to create a custom-fitted restoration that perfectly matches your bite and aesthetics․
The final restoration will be securely attached to the abutment, completing the implant process․ This stage marks the transition to long-term implant care, focusing on regular check-ups and diligent home hygiene practices․
Long-Term Implant Care: Maintaining Your Investment
Dental implants, with proper care, can last a lifetime, making them a valuable investment in your oral health․ However, long-term success relies heavily on consistent maintenance, mirroring the care you’d give natural teeth․ Regular dental check-ups – typically every six months – are crucial for monitoring the implant’s stability and identifying any potential issues early on․
Excellent oral hygiene remains paramount; Brush twice daily with a soft-bristled toothbrush and floss regularly, paying attention to the gumline around the implant․ Your dentist may recommend specialized cleaning tools to effectively remove plaque and prevent peri-implantitis, an inflammatory condition affecting the tissues around the implant․
Avoid habits that can damage your implant, such as smoking, excessive alcohol consumption, and using your teeth as tools․ Report any changes, like looseness or pain, to your dentist immediately․